Managing daily operations can be challenging when setting up booking software. Integration issues, complexity, or downtime might worry you. But the right steps will help you set up your booking system quickly.
With years of experience in the travel and tour industry, we've guided many businesses through this process. We understand the stress, but we also know the benefits of a well-integrated booking system.
In this guide, you'll learn how to set up booking software successfully. We'll provide clear, practical steps for everything from initial configuration and system integration to staff training and going live. By the end, you'll know how to make software setup seamless, boost efficiency, and satisfy customers.
Here's how to configure your booking software from scratch.
Book a free booking software demo
Step 1: Initial Configuration
Configuring your booking software is the first step. During this phase, see to it that your software meets your business needs. Here's how:
Setting Up User Accounts
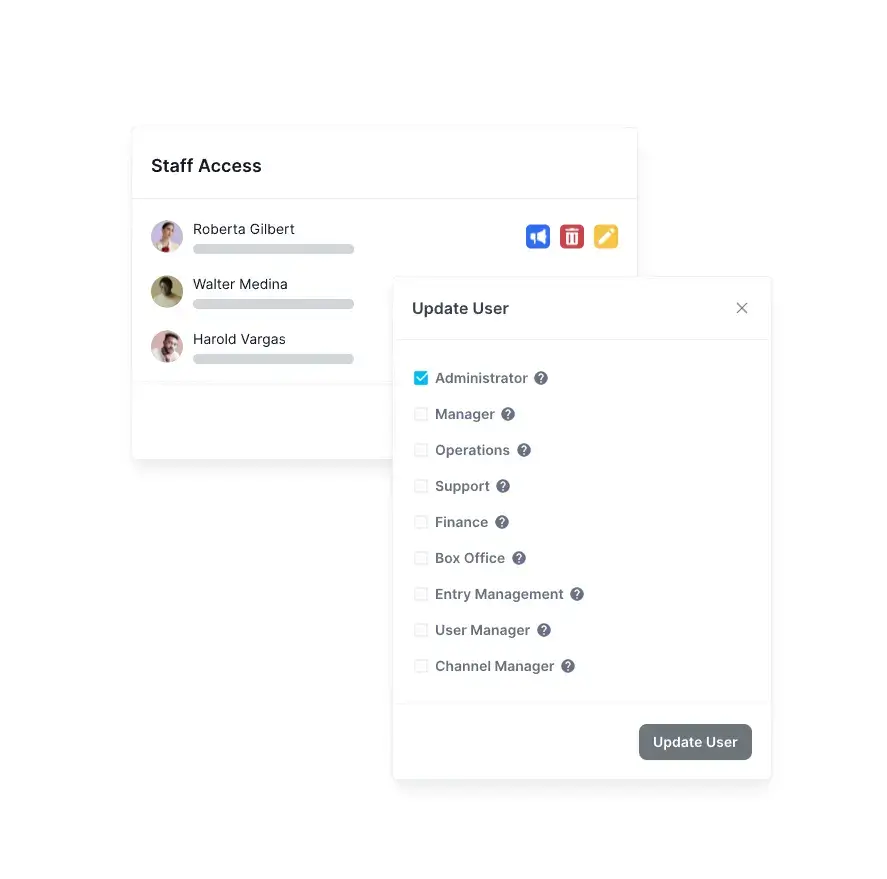
Create Admin and User Profiles:
- Begin by setting up an admin account, granting you full control over settings and user permissions.
- Create user profiles for your team. Make sure each user has the proper roles and access levels.
Customize User Permissions:
- Define what each user can view and modify within the software. This helps maintain data integrity and prevents unauthorized changes.
Customizing Settings
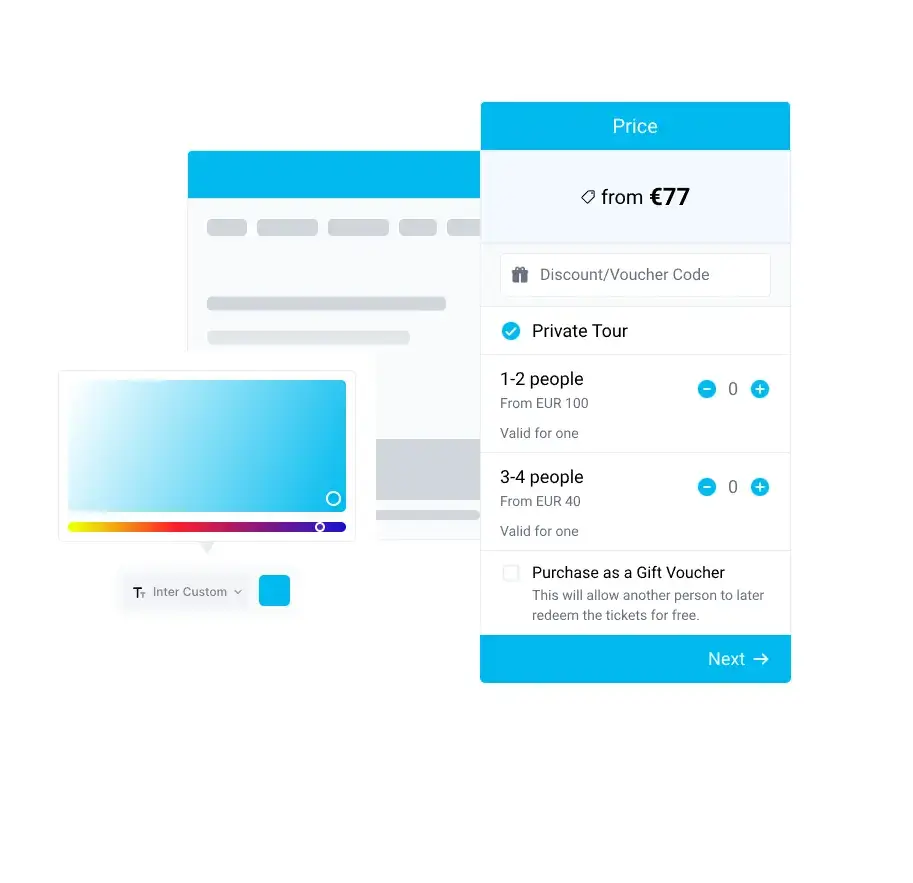
Business Information:
- Enter your business name, contact details, and logo. Customers will see these on your online booking page, and brand consistency helps them trust you.
Service Configuration:
- List all tours and services you offer. Include detailed descriptions, business hours, pricing, and availability. Ensure each tour has relevant images and key information like departure times and duration. This setup will make it easier for your guests to find and book appointments of your tours and activities.
Booking Policies:
- Set up your booking policies. This includes your cancellation terms, payment options, and special conditions. Clear policies help manage customer expectations and lessen disputes.
Notification Settings:
- Set up automated email and SMS notifications for booking confirmations, reminders, and follow-ups. This will keep your customers informed and engaged.
You can lay a solid foundation for your booking system by carefully setting up user accounts and customizing the software settings. This initial configuration phase ensures that your scheduling software meets your business needs.
Step 2: Integrating with Your Existing Systems
Nothing is more convenient than a fully-integrated reservation system. Full integration keeps your business connected, saving you time on manual work and reducing errors.
Connecting with Payment Gateways
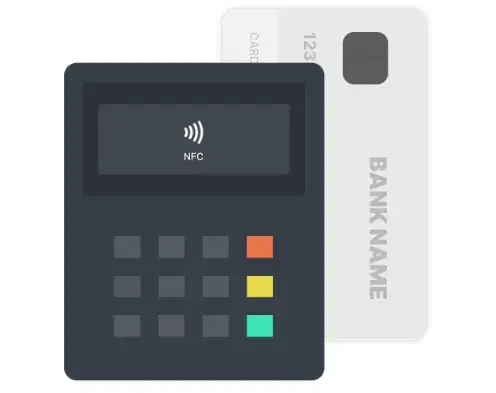
Select a Payment Gateway:
- Choose a payment gateway compatible with your booking software, such as PayPal, Stripe, SumUp, Spreedly, or Square.
TicketingHub works with all of these reputable payment gateways. Learn more about integrations.
Integration Process:
- Follow the software's instructions to integrate the payment gateway by entering your credentials.
- Test the payment process to ensure smooth and secure transactions.
Syncing with Inventory and CRM Systems
Inventory Management:
- Integrate your inventory system with the booking system to track real time availability, preventing double booking.
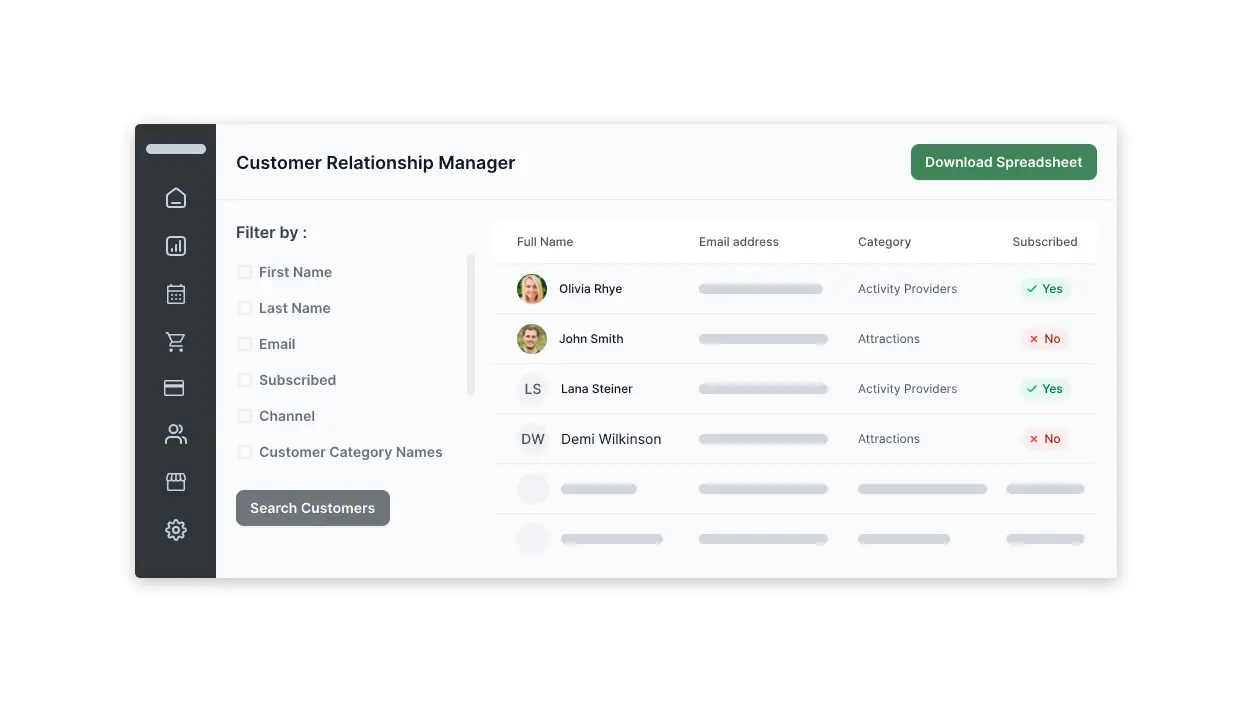
Customer Relationship Management (CRM):
- Connect your CRM to simplify customer data management, maintaining comprehensive records of interactions and booking history.
Email Marketing Tools:
- Integrate tools like Mailchimp to automate communication and marketing efforts.
Accounting Software:
- Link with systems like QuickBooks to automate financial tracking and reporting, simplifying bookkeeping.
Testing the Integration
Test Transactions:
- Conduct test transactions to ensure payments are processed correctly and inventory updates in real-time.
- Verify that customer data transfers accurately and notifications are sent as expected.
Check for Errors:
- Monitor the integration for errors and address issues promptly to prevent disruptions.
By integrating booking software with existing systems, you can make booking management easier and error-free.
Step 3: Data Migration

Data migration is one of the key steps in setting up booking software. In this step, you make sure that all existing bookings and customer data are transferred correctly to the new system. Proper data migration reduces downtime and keeps your business up and running.
Preparing for Data Migration
Backup Your Data:
- Make sure to back up all current data, such as customer information, booking details, and inventory. Store it securely to prevent data loss during migration.
Data Cleaning:
- Review and clean your existing data by removing duplicates, outdated information, and inaccuracies.
Importing Existing Data
Export Data from Old System:
- Export your data from the old booking system in a compatible format (e.g., CSV, Excel). Most systems have an export function to facilitate this process.
Map Data Fields:
- Map the data fields from your old system to the new booking software. Ensure customer names, contact information, booking details, and other relevant data accurately match.
Use Migration Tools:
- Utilize migration tools provided by your new booking system. These tools often include step-by-step guides and automation features to simplify the process.
Manual Data Entry:
- Double-check entries to prevent errors when transferring data that cannot be automatically transferred.
Ensuring Data Accuracy
Verify Imported Data:
- Verify that all data was correctly imported. Look for missing or incorrect information.
Test Scenarios:
- Test bookings and customer interactions will be conducted using the new system to ensure that data is functioning correctly. This helps identify and rectify any issues early.
Staff Feedback:
- Involve your staff in the verification process. They can provide insights and spot any discrepancies that may have been overlooked.
Setting up your booking page and online booking system correctly improves the overall booking process. It helps you manage recurring appointments, client data, and scheduling efficiently. So don't skip this in the process.
Step 4: Staff Training

You can only get the best out of a new software when you know how to use it right. This is why, invest in quality staff training and adoption. Here's how.
Providing Training Resources
User Manuals and Guides:
- Distribute comprehensive user manuals and guides provided by the software vendor. These resources offer step-by-step instructions and cover all key features. Check if the materials are accessible to all team members.
Online Tutorials and Webinars:
- Use online tutorials and webinars for hands-on learning. Many software vendors offer these resources to help users get acquainted with the system. Schedule sessions that fit your team's availability to ensure maximum participation.
FAQ and Support Documentation:
- Provide access to FAQs and support documentation. These resources can help staff troubleshoot common issues and learn at their own pace.
Organizing Hands-On Training Sessions
Interactive Workshops:
- Conduct interactive workshops where staff can practice using the online booking system in a controlled environment. Focus on essential functions like booking management, payment processing, and customer communication. Encourage questions and provide real-time assistance during these sessions.
Role-Specific Training:
- Tailor training sessions to different roles within your team. For example, front-desk staff may need to focus on booking and customer service features. In contrast, managers may need training on reporting and analytics tools. Ensure each team member understands how to use the software relevant to their responsibilities.
Ongoing Training and Refreshers:
- Schedule regular refresher sessions to reinforce key concepts and introduce new features or updates. Continuous training helps keep your team proficient and up-to-date with the software's capabilities.
Encouraging a Learning Culture

Create a Supportive Environment:
- Foster an environment where staff feel comfortable asking questions and seeking help. Encourage peer-to-peer learning and collaboration. Designate "super users" or software champions within your team who can provide additional support and guidance.
Feedback and Improvement:
- Collect feedback from your staff on the training process and the software itself. Use this feedback to improve training sessions and address any challenges encountered. Adjust your training approach based on staff feedback to ensure it meets their needs.
Recognition and Rewards:
- Recognize and reward staff members who excel in using the new software. Positive reinforcement encourages others to engage fully in the training process.
By making training resources available, organizing hands-on sessions, and creating a supportive learning environment, you'll make sure your team can use the new booking app like a pro.
Step 5: Testing and Troubleshooting
No matter how great a software is built, you will face troubleshooting issues. So make sure to test the software thoroughly before going live. From here, you can identify and get solutions to potential issues. This way, you minimize downtime when going live.
Conducting Thorough Testing
Feature Testing:
- Test all software features, including booking management, payment processing, notifications, and reporting. Ensure each function works as intended.
- Perform test bookings to simulate customer interactions. Check if bookings are recorded accurately and confirmation notifications are sent.
Integration Testing:
- Verify that the software integrates seamlessly with your existing systems, such as payment gateways, CRM, and inventory management. Ensure data flows correctly between systems.
- Conduct transactions to confirm payment processing works without issues and is reflected in your accounting software.
User Acceptance Testing (UAT):
- Involve staff members in UAT to test the software from a user perspective. This helps identify any usability issues and ensures the software meets business needs.
- Encourage staff to report any bugs, errors, or inconsistencies they encounter.
Performance Testing:
- Assess the software's performance under various conditions, such as high traffic or multiple simultaneous bookings. Ensure it can handle peak usage without slowing down or crashing.
- Monitor loading times and responsiveness to provide a smooth user experience.
Troubleshooting Common Issues
Identify and Document Issues:
- Keep a detailed log of any issues encountered during testing. Document the steps to reproduce the problem, along with any error messages.
- Prioritize issues based on their impact on operations and address critical problems first.
Consult Support Resources:
- Refer to the software's support documentation, FAQs, and user forums for solutions to common problems. Many issues can be resolved through these resources.
- Contact the software vendor's support team for assistance with complex or unresolved issues. Please provide detailed information to help them diagnose and fix the problem quickly.
Implement Fixes and Retest:
- Apply recommended fixes and updates provided by the support team or documentation. Ensure changes are tested thoroughly to confirm they resolve the issue.
- Retest the affected features and integrations to ensure they now work correctly without introducing new problems.
Continuous Monitoring:
- Continue monitoring the software for any new issues that may arise. Implement regular maintenance and updates to keep the system running smoothly.
- Encourage staff to report any problems they encounter after the launch to address them promptly.
With thorough testing and troubleshooting, you can achieve a smooth launch and a great booking experience for you and your customers.
Step 6: Going Live
Finally, it's time to launch. 🚀 But don't rest yet. In this final phase, make sure not to miss the small details that make a big difference in user experience. Check these out.
Final Checks Before Launch
Review All Settings:
- Double-check all settings, including user permissions, payment configurations, and notification settings. Ensure everything is correctly set up and aligned with your business needs.
- Verify that all tours and services are accurately listed with correct pricing, descriptions, and availability.
Backup Data:
- Perform a final backup of all data to safeguard against any potential issues during the launch. Ensure the backup is securely stored.
Inform Stakeholders:
- Notify your team, partners, and stakeholders about the launch date and any potential downtime during the transition. Clear communication helps manage expectations and ensures everyone is prepared.
Customer Communication:
- Inform your customers about the new booking system and any changes they might experience. Provide clear instructions on how to use the new system and highlight its benefits.
Free discovery call with TicketingHub here
Strategies for a Smooth Transition
Soft Launch:
- Consider a soft launch before the official go-live date. This allows a small group of users to start using the system, providing an opportunity to identify and resolve any last-minute issues.
- Gather feedback from these initial users to make any necessary adjustments.
Provide Support:
- Ensure that customer support is readily available during the transition. Offer multiple support channels, such as phone, email, and live chat, to assist users with any questions or issues.
- Prepare a list of common questions and troubleshooting tips to help your team provide quick and effective support.
Monitor Performance:
- Closely monitor the software's performance during the initial launch period. Check system stability, load times, and user interactions to identify potential problems early.
- Use analytics tools to track user behavior and gather insights into how customers are using the new system.
Adjust and Improve:
- Be prepared to make adjustments based on user feedback and performance data. Continuously improve the system to enhance the user experience and address any issues that arise.
Post-Launch Review
Evaluate Success:
- After the initial launch period, evaluate the transition's success. Assess key metrics such as booking rates, customer satisfaction, and system performance.
- Solicit feedback from your team and customers to identify areas for improvement.
Celebrate Milestones:
- Celebrate the successful launch with your team. Recognize their efforts and contributions to the project, reinforcing a positive and collaborative work environment.
Plan for Future Updates:
- Establish a plan for regular updates and maintenance to keep the software running smoothly and introduce new features over time.
- Stay informed about software updates from the vendor and implement them as needed to keep the system secure and efficient.
We wish you a smooth and painless software transition. Trust the process. Make sure not to shortcut. The better you start off, the more effective a digital booking solution will be for your tour business.
Conclusion
Setting up an online booking system may be daunting, but a step-by-step approach makes it manageable and beneficial. From the initial setup to going live, each phase is vital for success.
As we conclude, remember these essential tips:
- Use technology to enhance your tour business. Features like custom booking pages, appointment scheduling, and booking widgets can transform your service delivery.
- Effectively manage multiple locations and recurring bookings. Ensure seamless integration with your website and Facebook business page.
- Regularly update and monitor your system. Act on feedback to keep your booking software efficient, tailored to your needs, and ahead of customer expectations.
We hope this guide empowers you to maximize the potential of your booking software.
TicketingHub Makes Every Switch a Breeze
Ready to switch to a smoother booking experience? Try a free demo of TicketingHub's booking software today. With TicketingHub, moving is seamless—great customer service, flexible APIs, and a dedicated team of expert developers to guide you every step of the way.

FAQ
How can I make my booking page more appealing to customers?
Here are ways to attract more online bookings:
- Customize your online booking page to match your branding.
- Design an attractive tour website.
- Use a custom URL and include your brand's logo and colors.
- Add high-quality images and clear descriptions of your tours.
- Simplify the booking process.
- Make use of features like mobile compatibility, calendar syncing, and a user-friendly booking widget.
What should I consider in booking software for multiple locations and regular tours?
Choose booking software that updates in real time to avoid double bookings and ensures smooth operations at multiple locations. It should offer powerful scheduling tools that let you define rules for working hours, available services, and staff at each site.
For recurring tours, opt for software that supports regular appointments and integrates automated workflows to minimize manual tasks. Features such as syncing with Google Calendar and automated reminders also boost efficiency and satisfaction.
How can I effectively use free booking software in my business?
Start with a free online booking system or free scheduling app to move your appointment scheduling online without upfront costs. These free tools typically support basic functions like online booking, self-scheduling, and appointment cancellations.
Ensure the system allows a custom booking page, integrates well with your existing website, and supports mobile apps for both administrators and clients. Use features like intake forms and automated reminders to decrease no-shows, and simple payment options to handle transactions.
As your business expands, consider switching to paid plans for additional features like group event scheduling, virtual appointments, and advanced analytics.
Get your TicketingHub demo now


